Project 3 - Magic Box and Projections
Week One
2/24/26
The purpose of this project is to create a background plate that contains a box or lid that can be opened using 3D geometry and a projected texture. When the lid opens, the viewer should see a fully 3D-rendered environment inside. The goal is to blend live-action footage with CG elements so that the transition between the real-world plate and the digital interior feels seamless and believable.
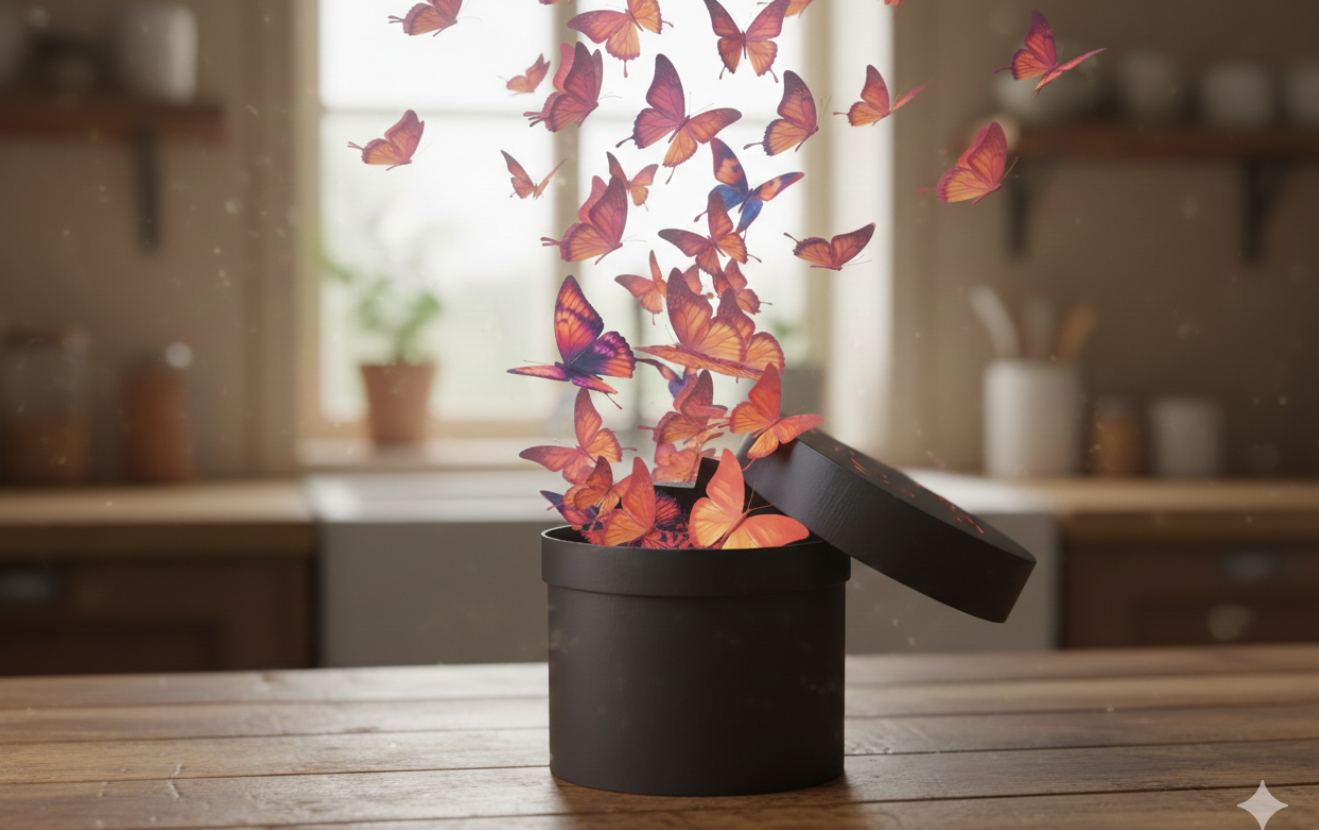
My original concept was fairly simple. I planned to create a circular box that, when opened, would release butterflies that would fly out into the surrounding environment. The idea was to create something magical and whimsical, almost like a hidden world contained inside a small object. To visualize the concept, I created some early concept imagery using Nano Banana. This helped me get a rough sense of the project's overall look and tone before moving into production.
2/26/26
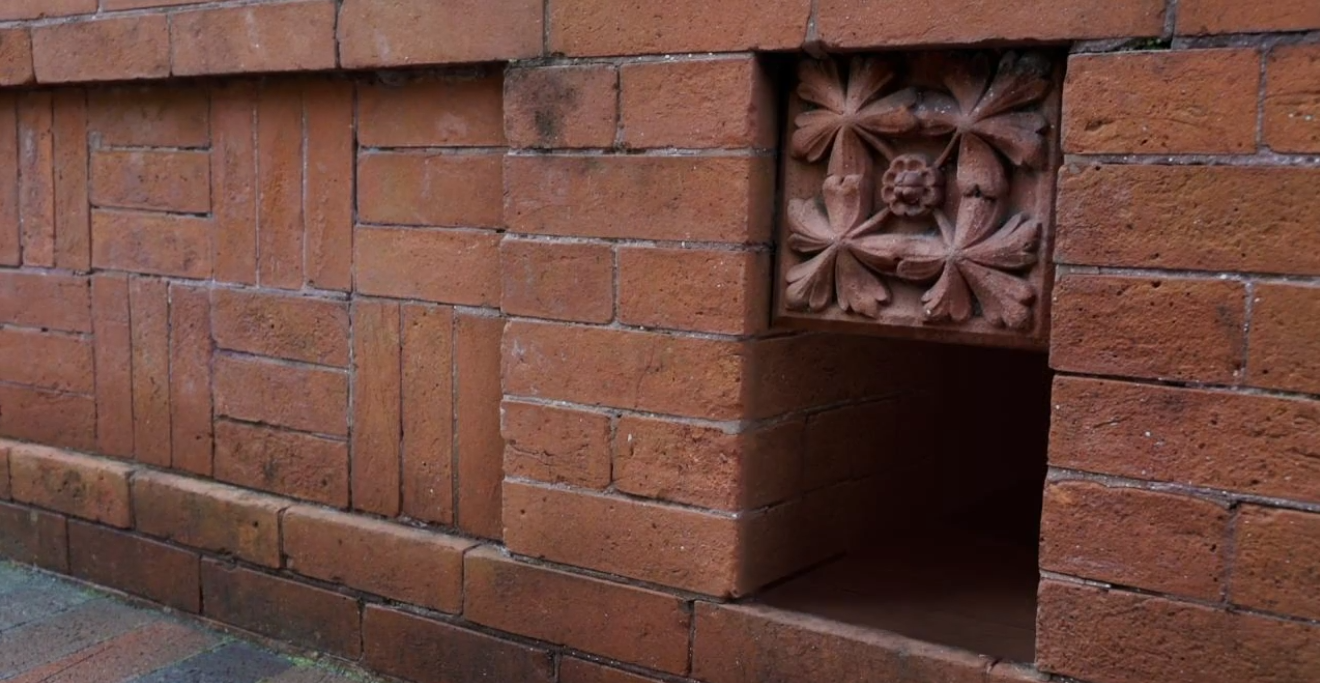
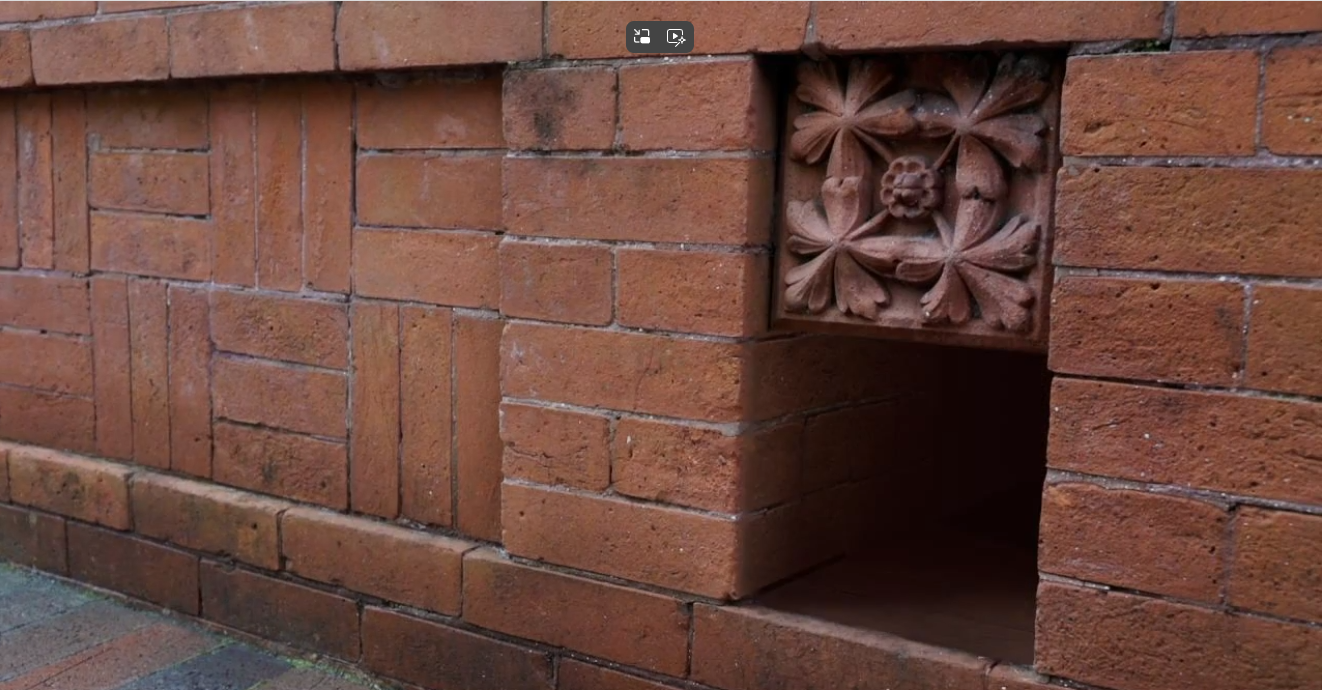
While walking around the city looking for potential locations to film my background plate, I noticed several interesting brick walls with complex inset panels. These architectural details immediately caught my attention because they almost looked like hidden doors already built into the wall.
At that moment, I thought, “Wouldn’t it be cool if those opened?”
That observation led me to shift the concept slightly. Instead of a circular box sitting in the environment, the “box” could actually be embedded into the wall itself. The panels in the brickwork could open outward, revealing a hidden interior space behind the wall. This direction felt more grounded in the real world while still allowing for a magical reveal within.
Below is the clean plate of the shot I captured for the project.
Along with the clean plate, I captured several reference elements that would help later during lighting and compositing. These included a shadow plate, a grey ball, a cube, and a chrome sphere for creating an HDR reference. Collecting these elements on set helps ensure that the lighting of the CG elements will match the real environment as closely as possible.
Week Two
3/5/2026
At the beginning of the second week, I spent time exploring what exactly I wanted to place inside the opening wall panels. I still liked the original idea of butterflies, but I wanted to combine them with something else to make the interior environment feel more alive.
I have access to a bird model that already contains pre-built animations, so I planned to incorporate that into the scene as well. My idea was to have the bird either fly out of the wall when the panels opened or land somewhere within the interior environment.
For the environment itself, I envisioned a lush tropical interior filled with foliage, rocks, and tree branches. I also briefly considered having branches and flowers grow outward from inside the wall as the panels opened, as if nature were expanding beyond the hidden space.
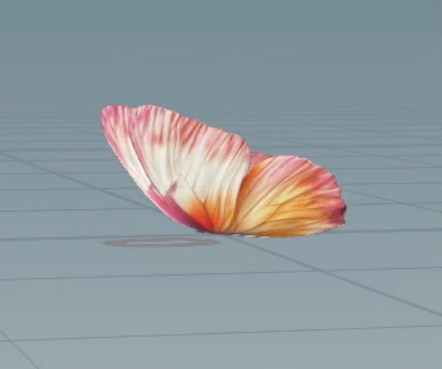
At this stage I began blocking out the scene layout, though I did not get as far as I had hoped by the end of the second week. The butterfly animation and model were created in Houdini, while the bird model is credited to VFX Grace, specifically their Coracias Caudatus model.
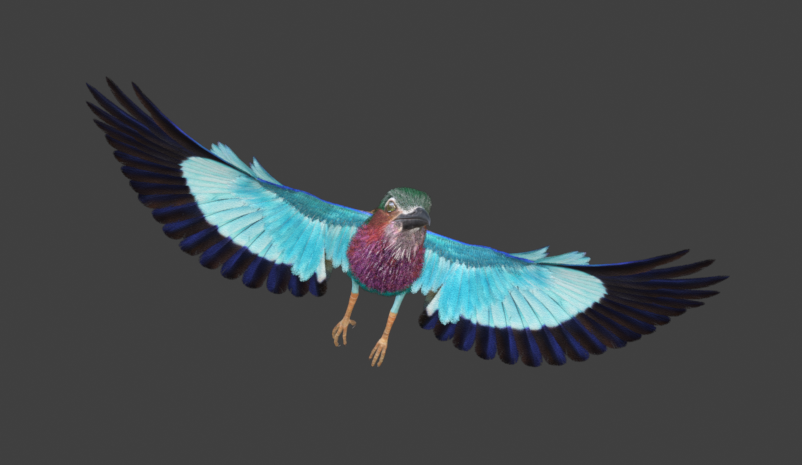
VFX Grace Bird Model
Overall, the camera tracking process went smoothly, and the track appears to be holding well. The CG elements seem to be correctly adhering to the environment, which is always a good sign early in the pipeline. I also began experimenting with aligning the interior faces of the panels with the original footage so that, when they open, the transition between projection and CG geometry feels natural.
3/6/2026
I have also explore creating an AI generated depth map using SculptOK AI Depth Map Generation.
This was the depth I got from uploading a flat image of the wall square, and how it deformed the geometry in Houdini heightfields.
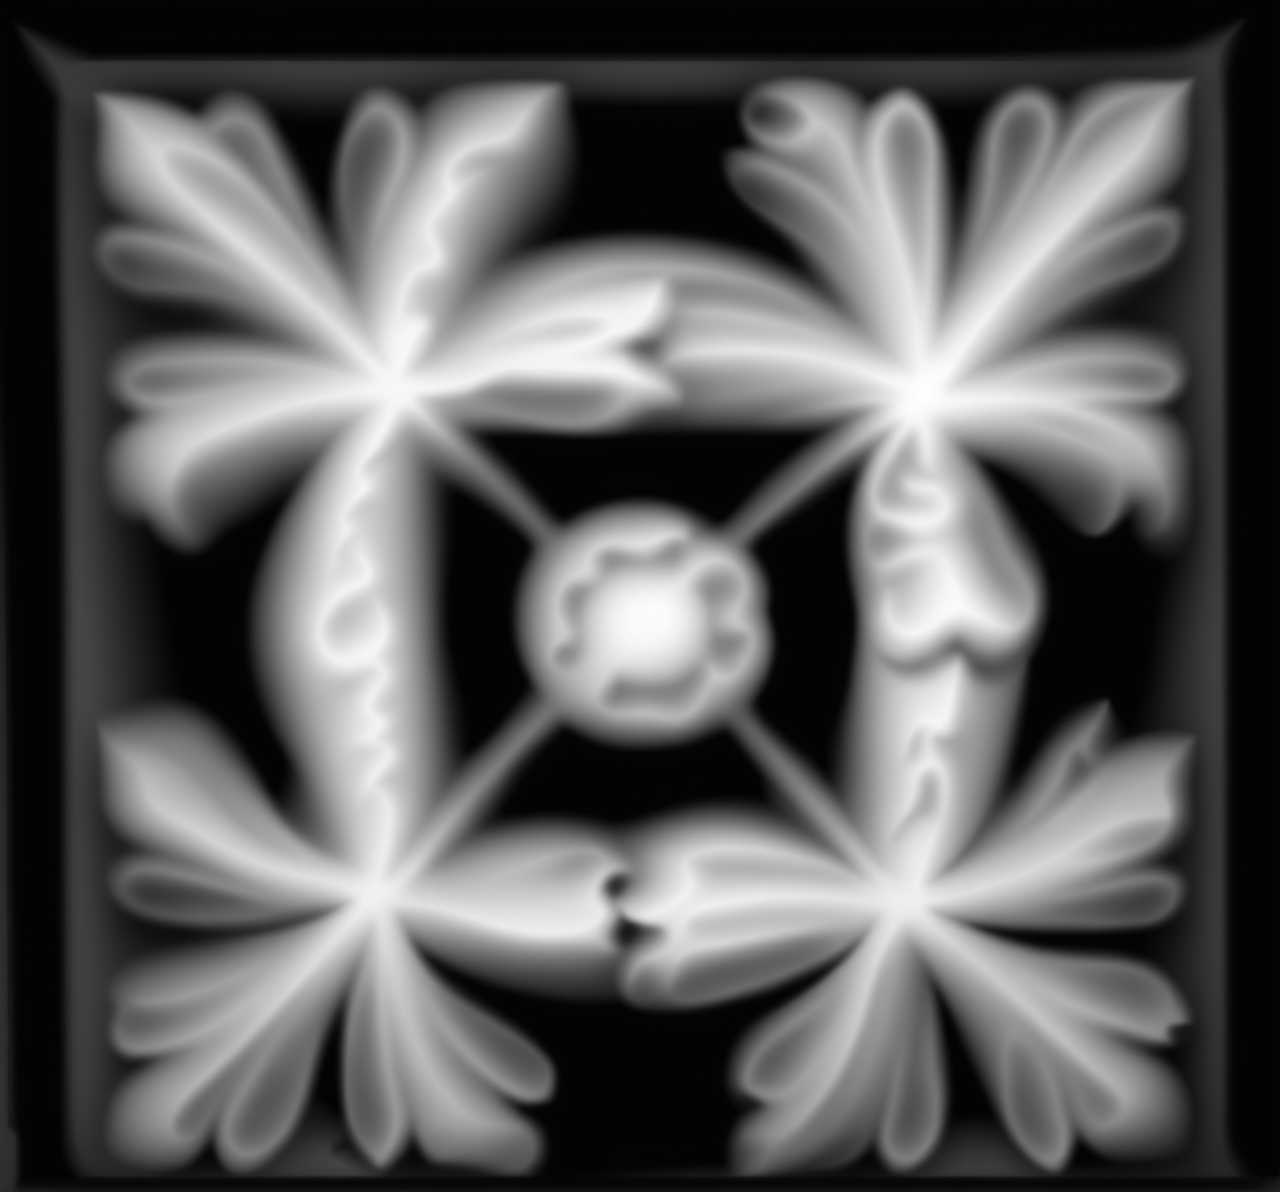
AI Generated Height Map
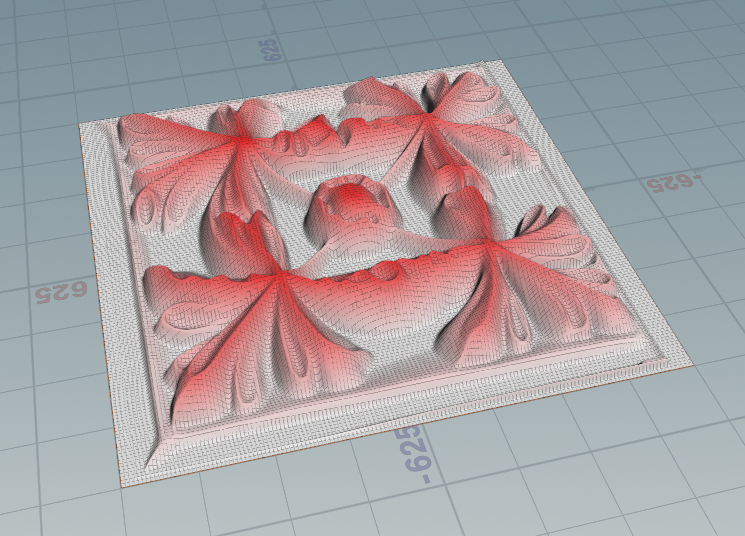
Houdini Heightfield
Pivot time!
Unfortunately, due to several factors—including being on set for three days during finals week and the render farm being somewhat unreliable—I had to reconsider the scope of my original plan.
My initial idea involved birds and butterflies flying out of the brick wall, along with a detailed foliage environment inside the panels. However, after testing some early renders, it became clear that the bird model in particular would significantly increase render times. On top of that, I realized I would not have enough time to develop the interior foliage to the quality level I wanted.
Because of this, I decided to simplify the concept while still keeping the core idea of something unexpected emerging from the wall. The goal became finding a balance between producing high-quality work and keeping the workload manageable, given the number of deadlines happening simultaneously.
I decided to keep the “bug” concept but change the interior environment. Instead of a tropical scene inside the wall, the bricks themselves will extend inward, creating a more architectural interior space. The main CG creature will now be a centipede emerging from within the wall structure.
Additionally, I plan to convert the butterfly system I built in Houdini into a fly system. This allows me to reuse the work I already completed while still fitting the new, slightly darker tone of the piece.
The flies may not be fully ready for the class presentation on Monday, but they will most likely be included in the final resubmission once everything is fully rendered and composited.
3/7/2026
After deciding to pivot the concept, I spent most of today restructuring the scene to match the new idea. Since the birds and tropical foliage were no longer part of the plan, I focused on refining the brick interior and making sure the geometry extended convincingly behind the wall panels. I used a combination of 3D geometry and image planes with the brick texture of the wall I went and photograph to make the transition as seamless as possible.
This is the extend interior plate, which I basically just treated as the new background plate going forward. To do this I started with a
Final First Submission!
Critique
Make centipede shinier and darker, more accurate and realistic to a real-life one.
Potentially add another centipede.
Fix the color on the lid, it is a lot brighter than the surrounding bricks and this highlights the fact that it is a 3D model and prevents the believability of the image.